Saturday, October 27, 2012

DIY Tutorial for Rustic Frame with Mongram Letter


Yay for good news! Buffalo Bleu moved to Colorado and we are no longer living miles upon miles apart!  Buffalo Bleu has always had roommates though and moving into a 2 bedroom house left him with a lot of space and little decor, so I made this wall hanging using a barn wood frame and the letter E as that's what his last name starts with.

Isn't it CUTE!  (Don't tell Buffalo Bleu I called his gift cute.)

Here's what you need:
A frame without glass and backing (check thrift stores, garage sales, etc.)
Your letter
Acrilyc paint (if your letter needs painted)
A paint brush (if you're painting your letter)
String, twine or I used leather suede lace to keep that rustic, manly look!
Hot glue gun
Heavy duty stapler

I bought a wood stain pen in white for my letter, not thinking about the fact that Buffalo Bleu's walls are white and the "E" wouldn't show up.....duh!  Fortunately for me I was over at EllBee's house and she has a basement full of crafting supplies.  I used a deep red color that I selected for the simple fact it was called wine.


Now comes the tricky part...fastening your letter to your frame.  I cut approximately a 3 foot long piece of the leather suede string and tied two knots about 9" in from each end.
 That is a knot.
 Now staple the leather suede string to the back of the frame right underneath the knot with the loose end hanging out on the top.  Do the same on the other side to make a loop that hangs down inside of the frame.

Now for the tricky part....try to stretch the string using a pen to find the middle of the loop.  Put a dab of hot glue on your letter in the middle then stick your loop down.  I did this a few times before I figured out exactly how the "E" was weighted and where the center was.

Then I tied the two loose ends at the top of the frame in double knot to hang.  Let's hope he likes it!


Friday, October 26, 2012

Where the beer flows like wine!

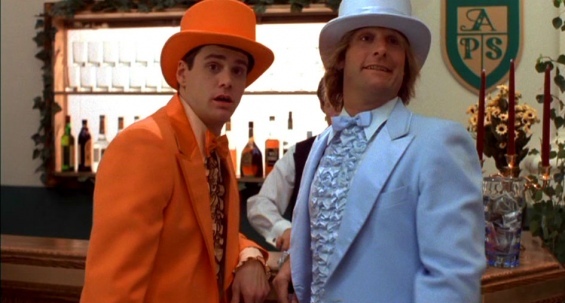
I'm talkin' about a place where the beer flows like wine. Where beautiful women instinctively flock like the salmon of Capistrano. I'm talkin' about a little place called Aspen. 
Buffalo Bleu and I recently traveled to Aspen, Colorado to see the Maroon Bells and let me tell you!  They were amazing!


Enjoying a picnic by the lake!


Monday, October 22, 2012

Wednesday, September 12, 2012

It's Momma Bert's Birthday!

On August 28th we celebrated Momma Bert's birthday!  Her favorite candy is Turtles, so I decided to give homemade Turtles a whirl and let me tell you...it was the easiest candy ever and they are delicious!!  No oven required!  Friends and family members can look forward to Turtles at Christmas for the next 50 years!

Turtles for Bert

You will need:
1 -  package soft caramels - approx 14 oz.
1 - package semi-sweet chocolate chips - approx 1.5 cups
1 - package pecan halves - approx 1.5 cups
Cooking spray


Measure 1.5 cups of pecans.  There should only be a little left in the bag which I ate plain, but you could use and make more turtles.


It is optional, but I prefer to have my pecans toasted.  If you'd like to toast your pecans you will have to use the oven. I know!  I know!  I said no oven required, but it's worth it!  Toasted pecans are YUMMY!!!  So, preheat that dreaded, God awful oven to 350°F.  Lightly spray a cookie sheet with a non-stick cooking spray.


Spread the pecans out on the cookie sheet in a single layer.


Once the oven is preheated, put the pecans in the oven for approximately 5 minutes, but keep a close eye on them as they can scorch easily!


In the meantime cover another cookie sheet with aluminum and spray with your non-stick cooking spray.  


Once your toasted pecans are done and have cooled arrange them on the cookie sheet with 4 to a cluster as seen below.


Like the pecans I used almost all of the package of caramels.  I had about 8 leftover and ate 2...they were good.  Add a spoonful of water to the caramels and microwave in 30 second increments stirring in between.


You want the caramel to be a gooey consistency that drizzles off the end of your spoon.  Don't let it get to runny or it'll be all over your cookie sheet and not on your pretty little turtles.


Drizzle the caramel over the center of the four pecans that form the cluster.


Caramel and pecan yummy goodness!  I was tempted to forget the chocolate and dive in, but managed to stay strong.


Now it's time to melt the chocolate.  Using 1.5 cups of semi-sweet chocolate chips in a microwave safe bowl microwave in 30 second increments stirring each time until the chocolate is a smooth consistency.  Don't over microwave as it can cook the chocolate and become lumpy and grainy.


Drizzle the melted chocolate over the caramel.  You may want to use the back of your spoon to smooth the top of the chocolate and spread out over the caramel and pecans.


Now let them cool.  You can put them in the refrigerator, but this will most likely result in a cracked tooth later as the caramel will be extremely hard.  If you have a cool basement or somewhere chillythat works the best.


Once cooled....ENJOY!!


Happy Birthday to the most amazing mother! A woman of God, humility, grace, patience, and unconditional love.


Wednesday, August 29, 2012

A weekend away! - Breckenridge, Colorado


My beautiful nephew!  Often known by his aliases - Punkin' and Monkey.

God is good!

Abandoned building on Main Street in Breckenridge, Colorado.

Main Street in Breckenridge, Colorado.  Apparently red is a popular vehicle color in this area?


Breckenridge Brewery Tester


My brother and Monkey's Daddy sportin' his new Tom eyewear!


No worries Monkey!  The glass is always half full :)